DIY flamingo stenciled napkins
I have a little infatuation with strange animal memorabilia. I don't exactly know where it came from or how it developed, but every time I see a version of an animal that is particularly tiny or has particularly skinny legs or is made of a strange material, I'm weirdly drawn to it (whether in Christmas ornament form or as decor or whatever else, and I'm particularly drawn to insects and reptiles). I know you're picturing me with a collection of Beanie Babies and those porcelain animal figurines in a shadow box and cat mugs but it's not anything like that—it's really not. But now I feel like I've sort of dug a hole where I'm arguing that there's a distinction between a tiny plate with a miniature turtle on it and a shadow box figurine; there's probably not. Enter: cutest-to-me tiny spindly-legged flamingos in fun hot pink for summertime.
I have been dying to make all sorts of fun napkins and towels with stencils and stamps, and this was my first project. I love how they turned out—imperfect enough to not be corny (the idea is not to recreate an anatomically perfect flamingo, or else that's where it crosses the line of cute/fun to nature craft show).
Here's what you will need
Pre-washed white cotton napkins
Flamingo stencil (I used this one)
Fabric paint in pink, or a couple of pinks (I used Tulip Glow in the Dark in Pink because of its cute neon color)
Fabric paint in black (I used Tulip Slick in Black)
2 foam paint brushes
Plastic plate for paint
Masking tape is optional; I just used my hand to keep the stencil steady
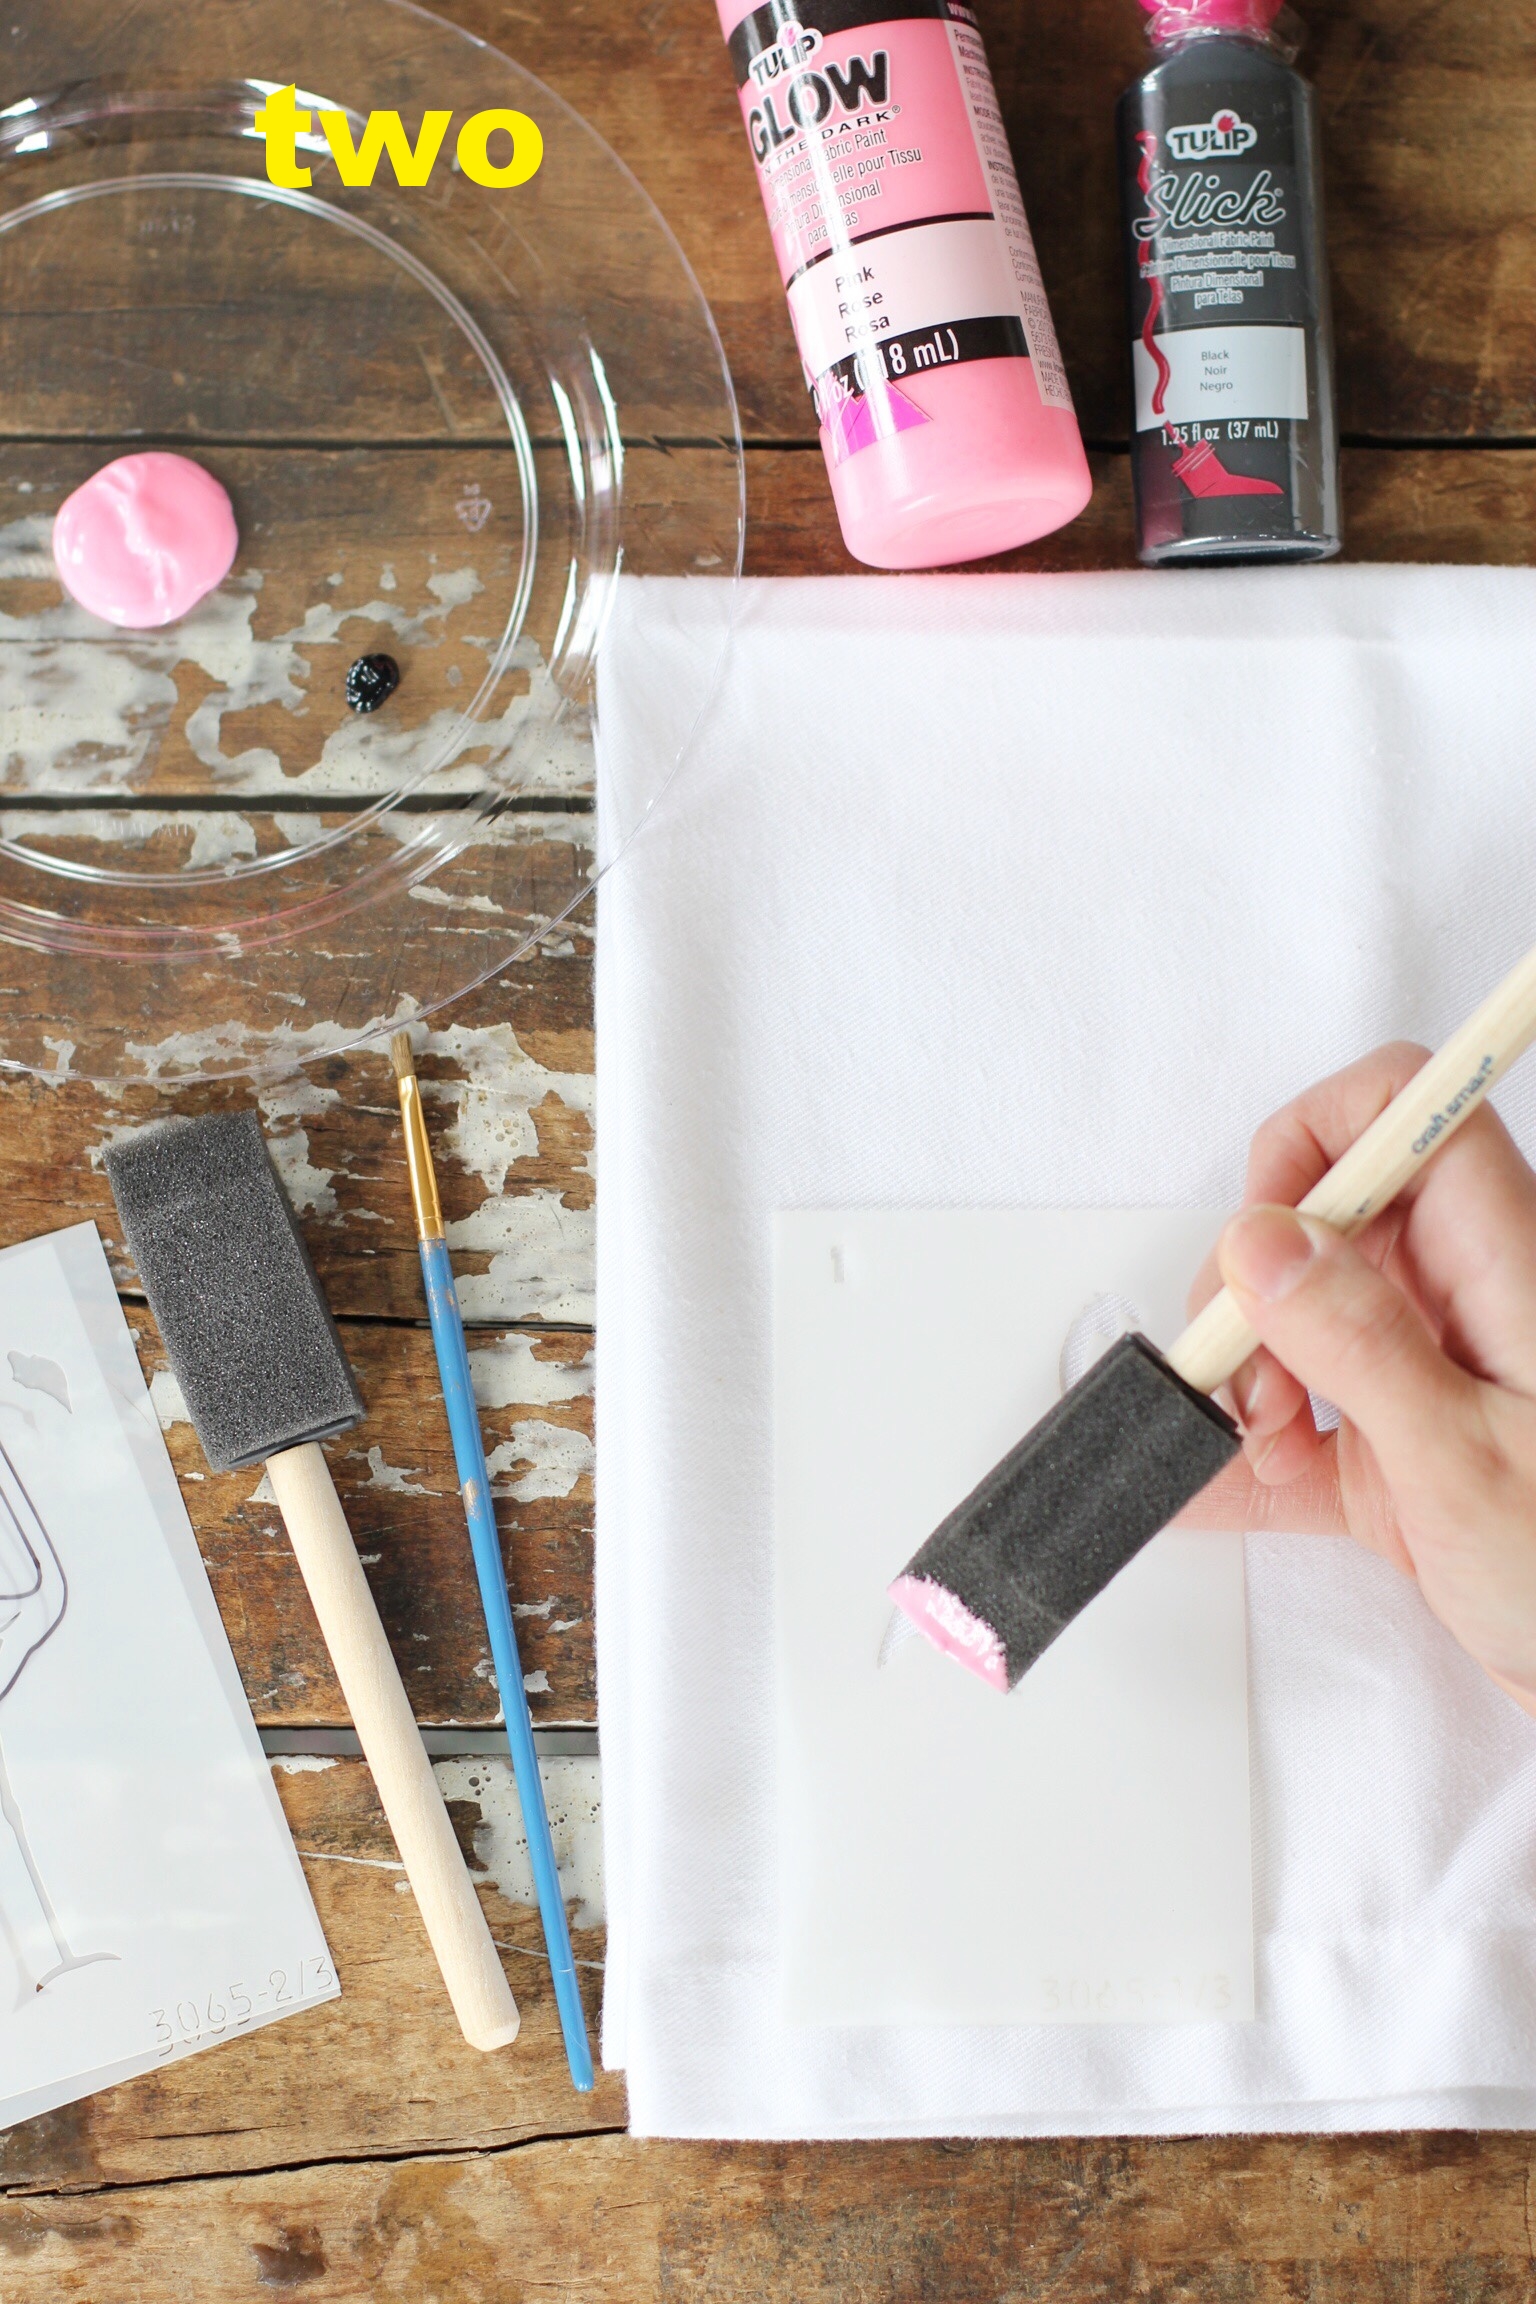
This is a very simple DIY; it merely requires a steady hand (or tape if you want to make things very easy). Use the pictures below as a guide, followed by my written instructions.
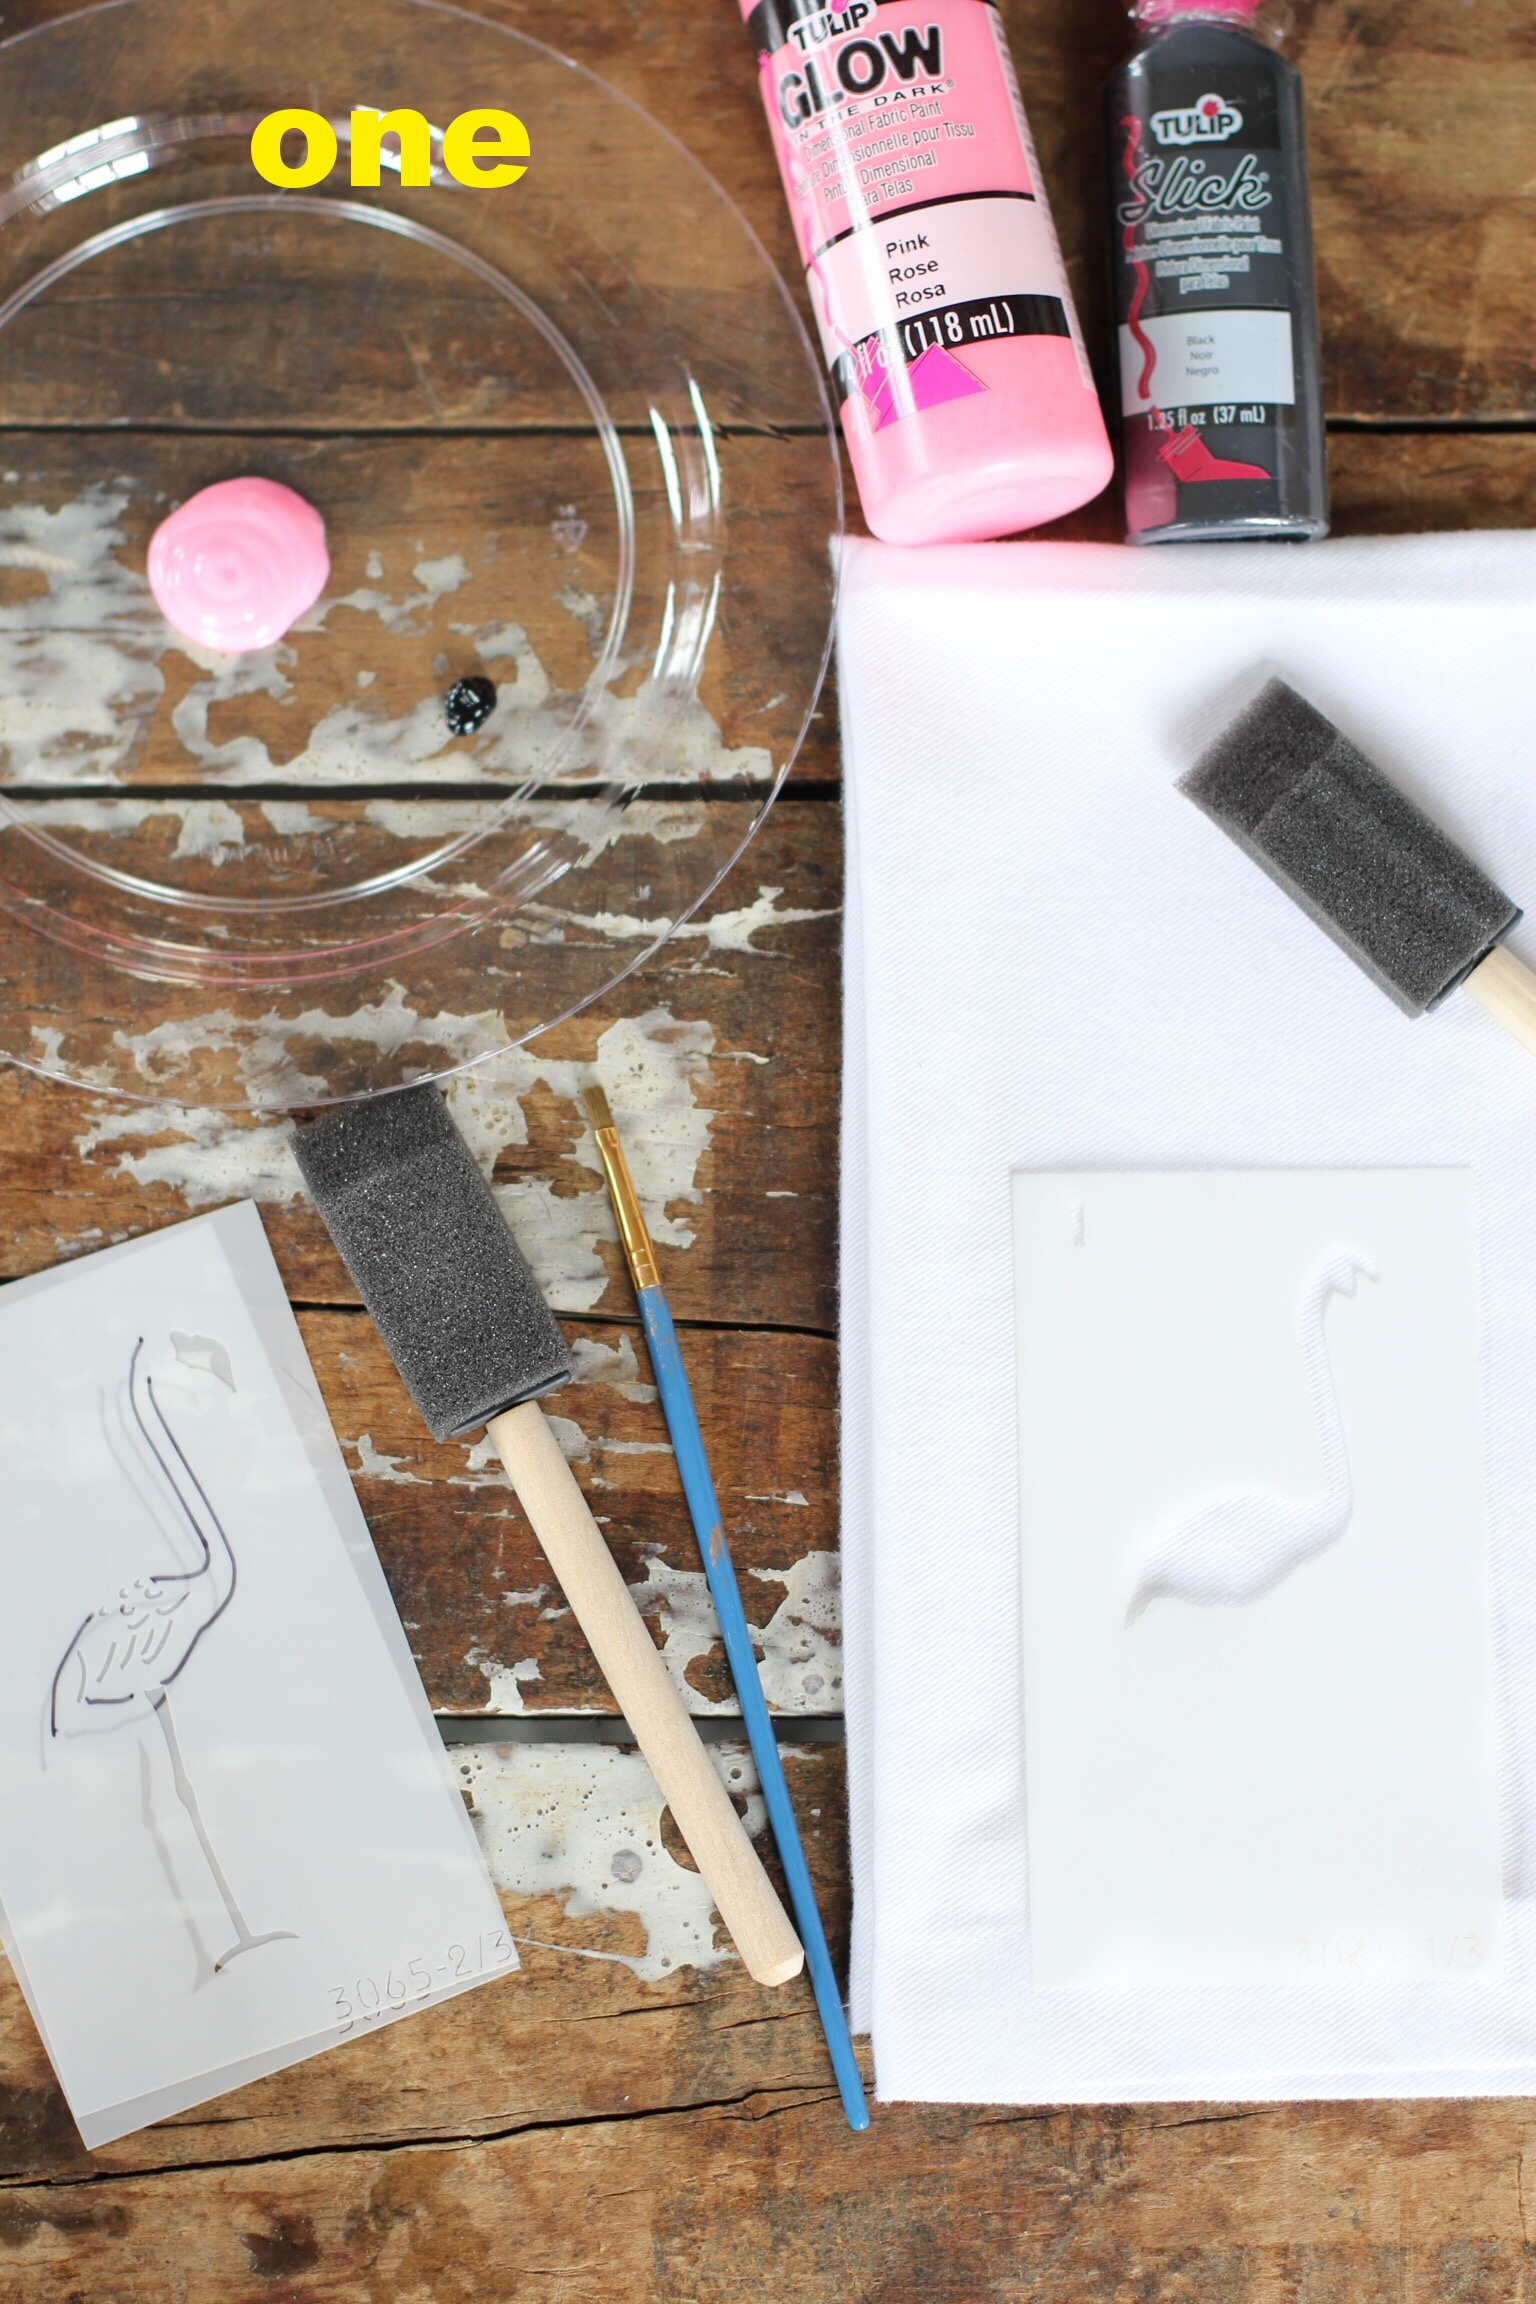
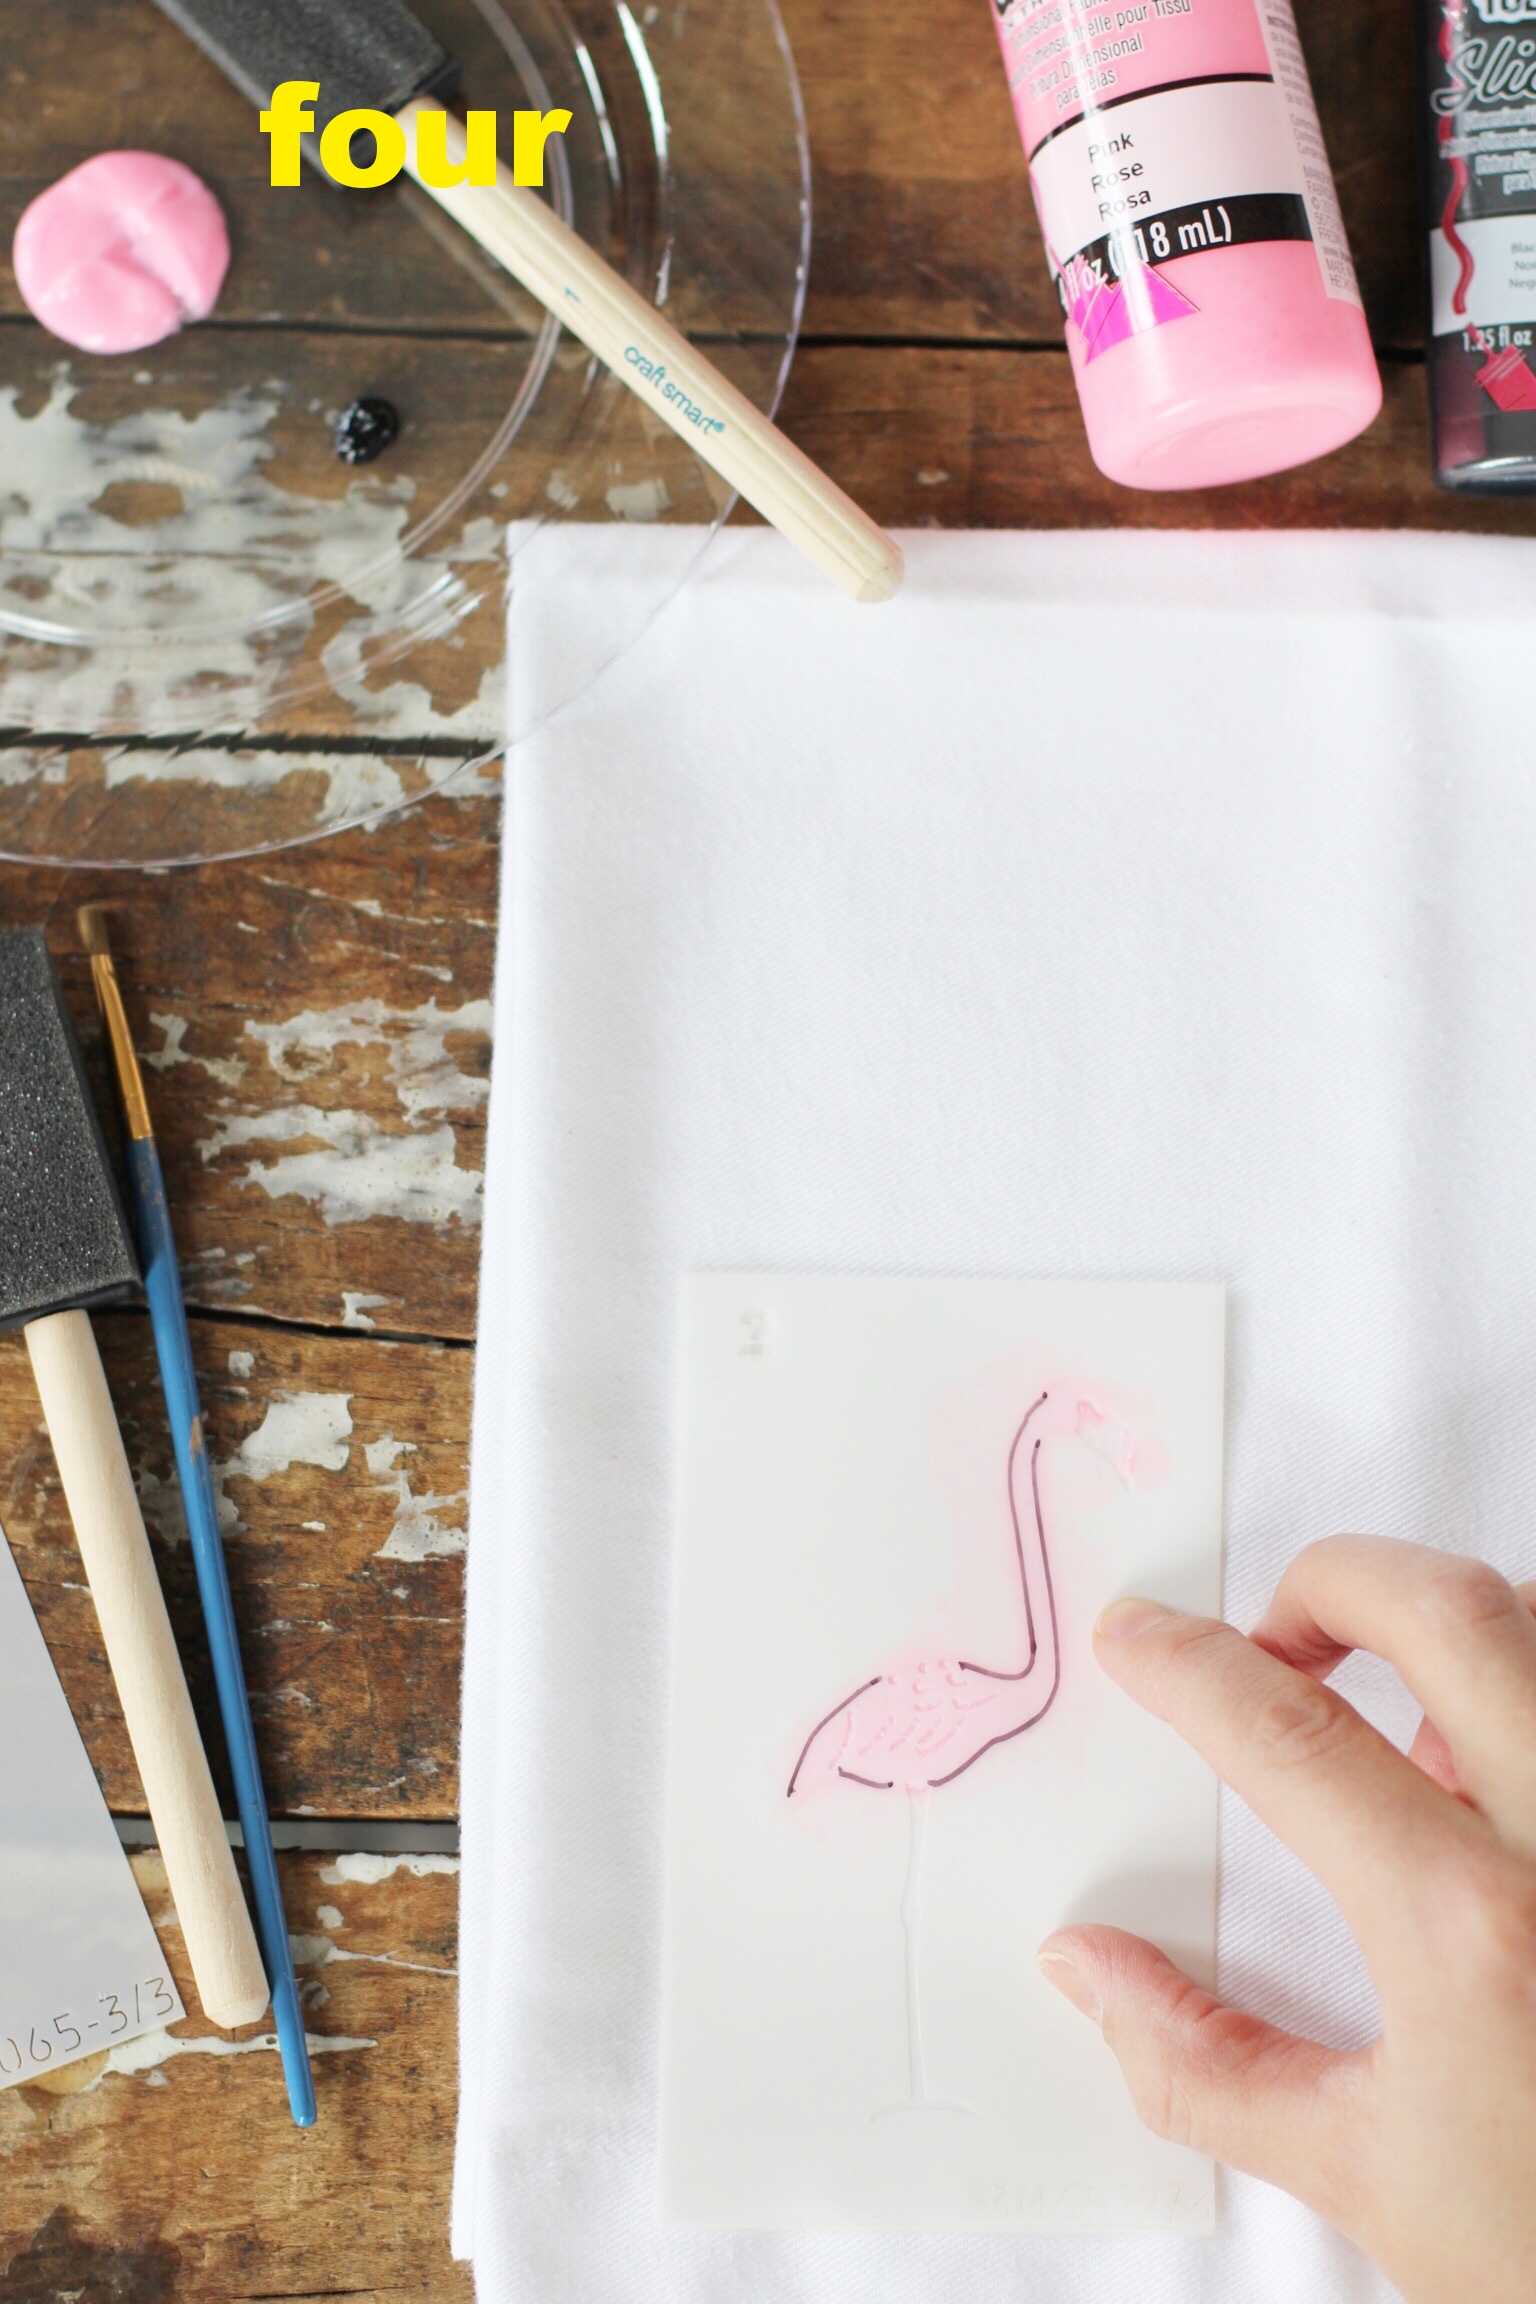
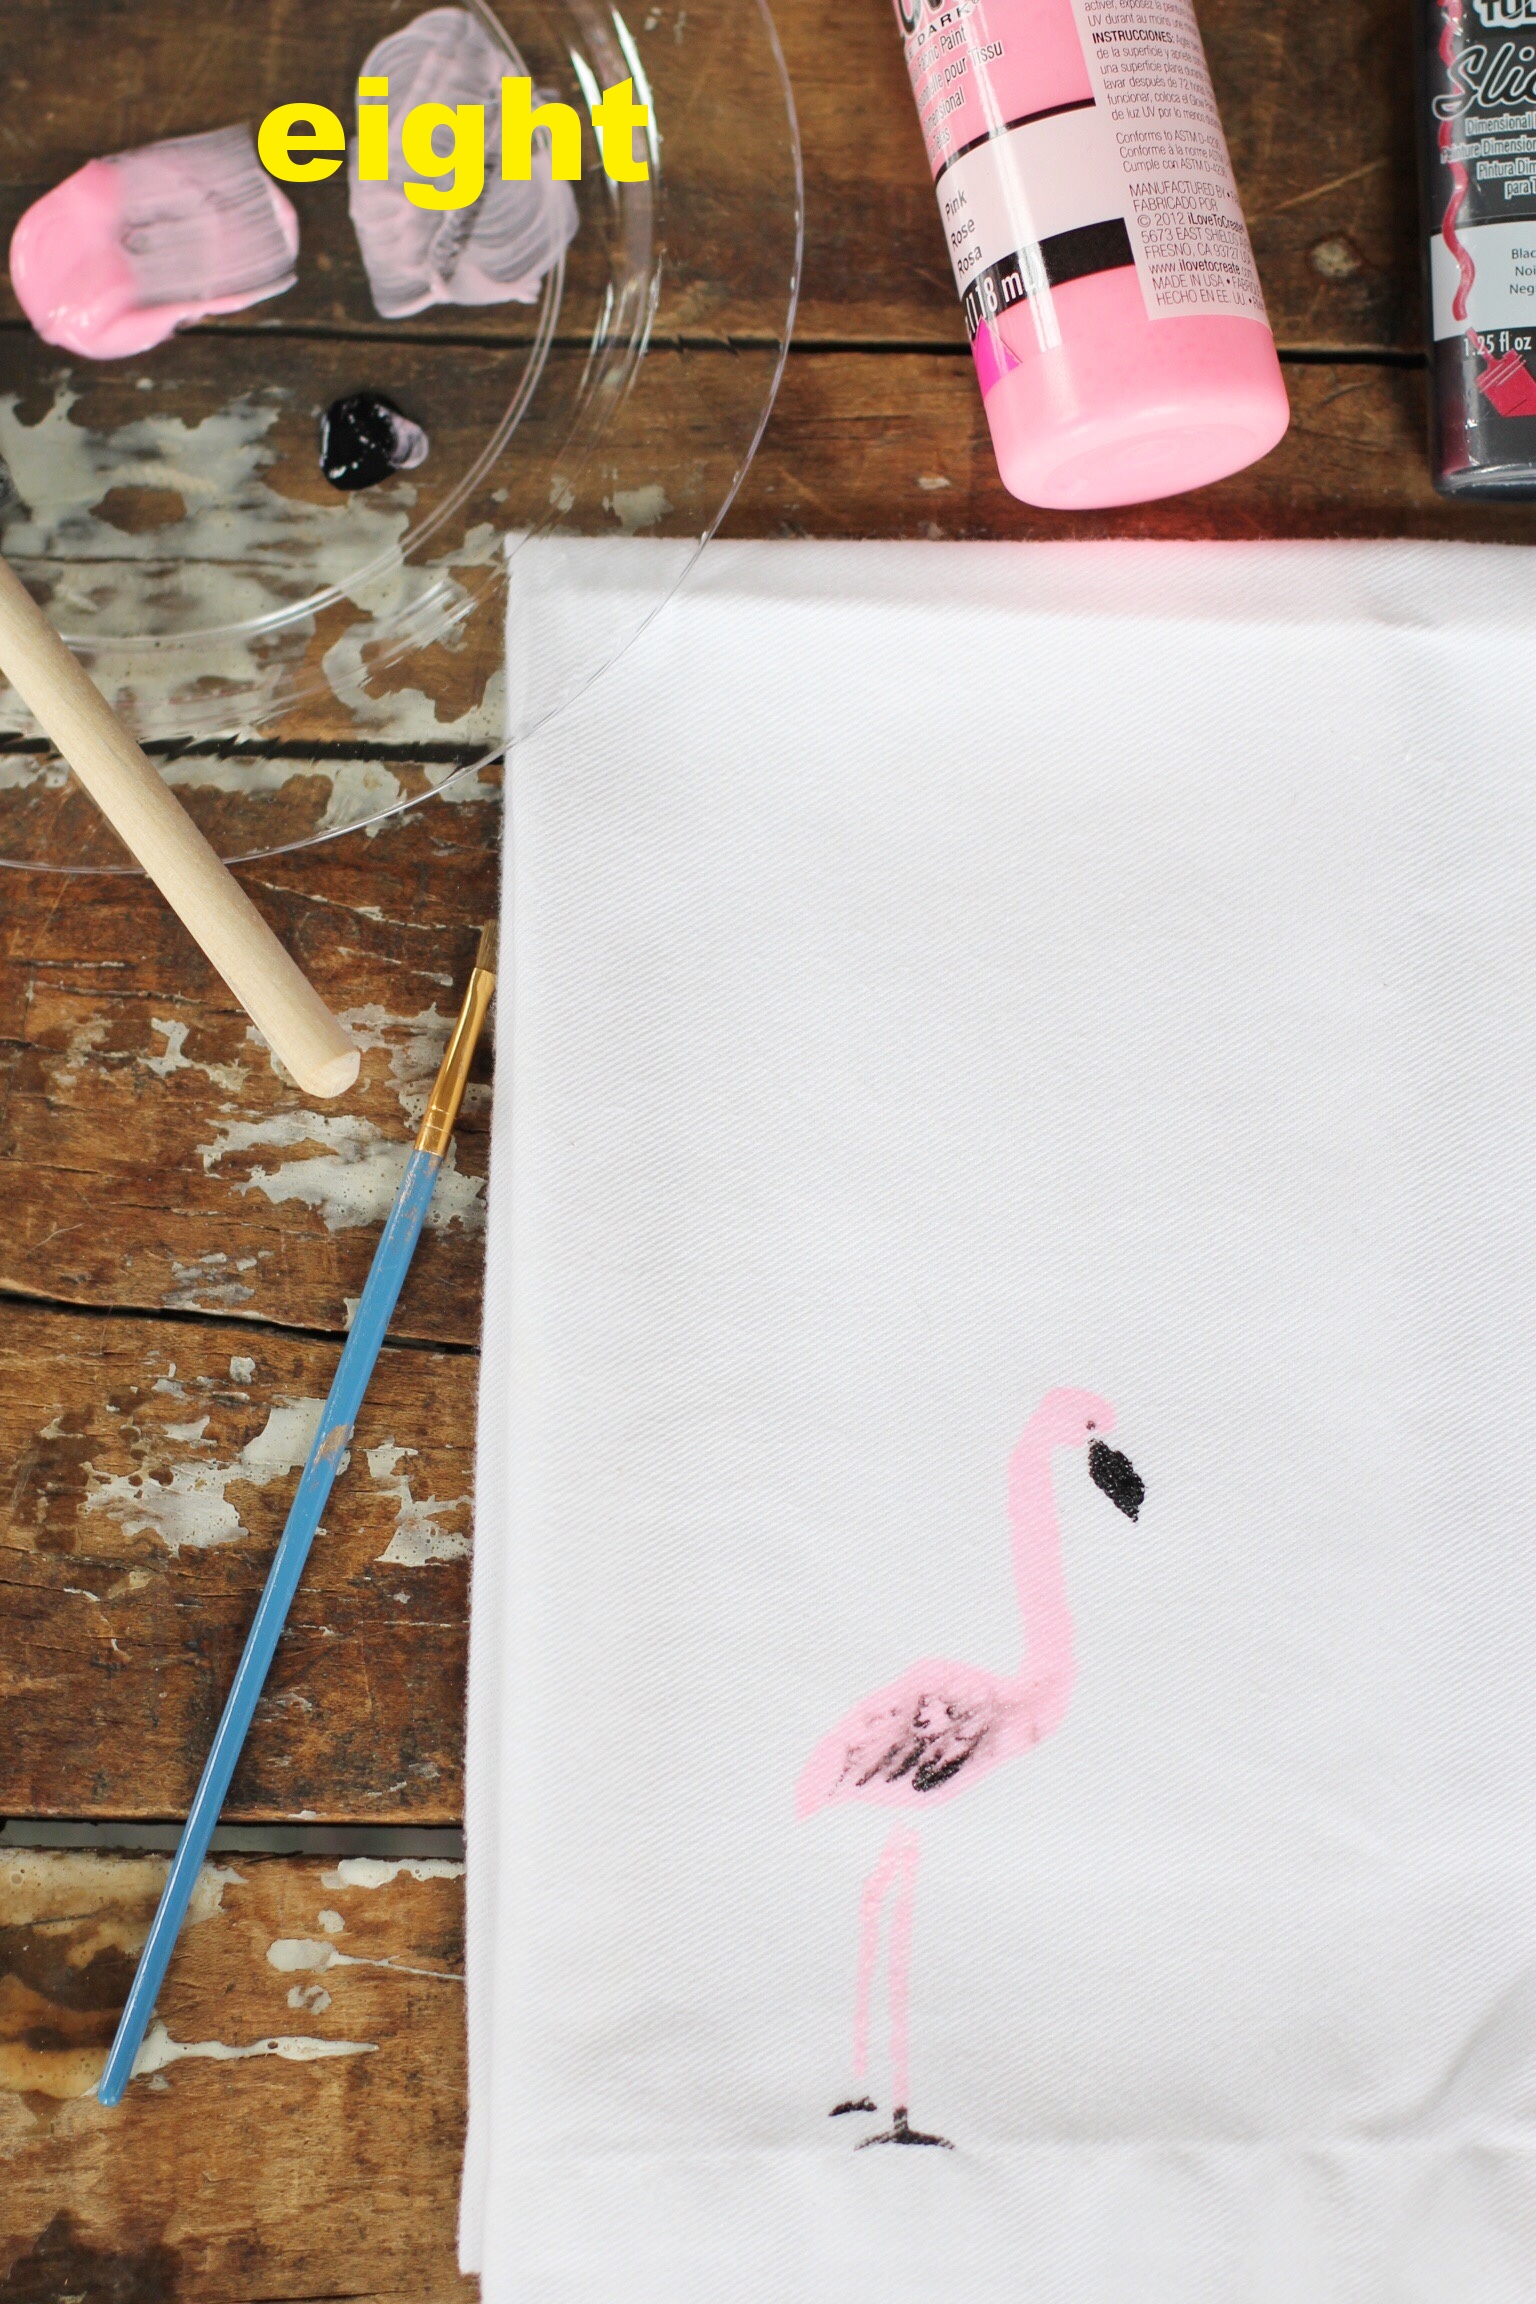
Prepare your napkin by folding it however you'd normally fold it—I did mine in thirds and chose to stencil on the lower part of the front panel. Squeeze a little bit of paint onto your plate and lay out your brushes and stencils.
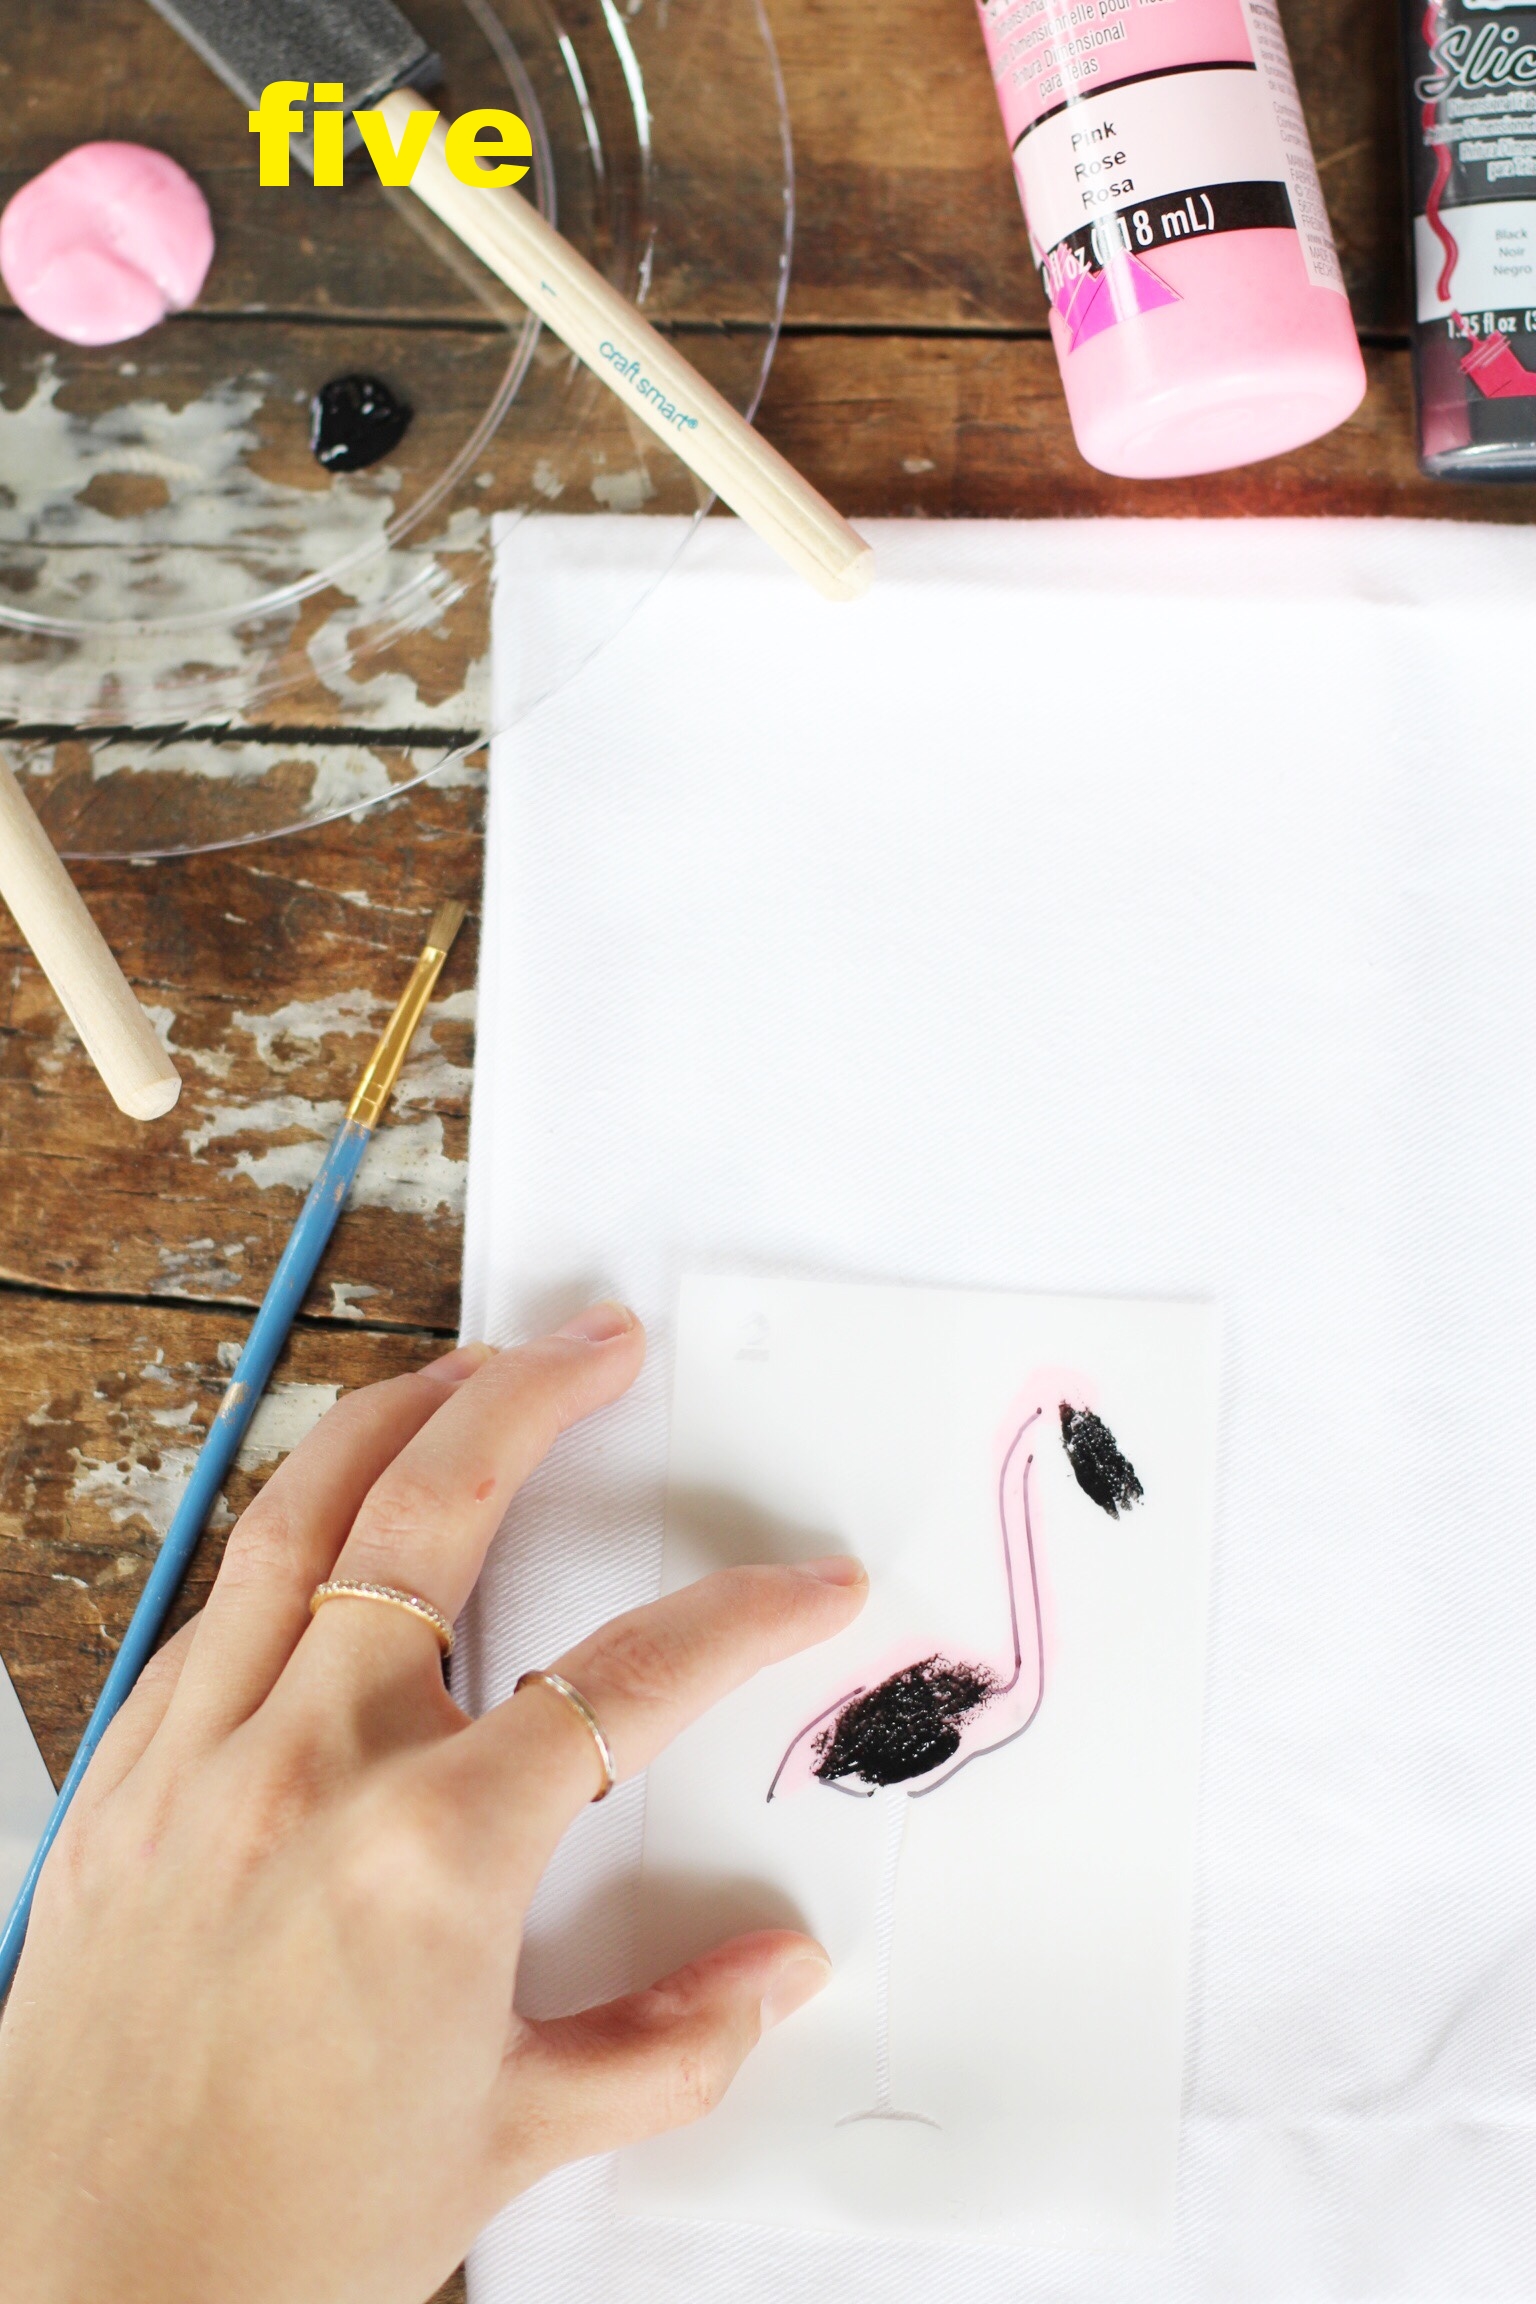
Before you begin, keep in mind these pointers: make sure you let the paint set between each step so that when you place the next stencil on top it doesn't mess up the layer underneath. Hold the stencil very still and flat to avoid bleeding lines. When you're painting, dab the brush up and down repeatedly, using it like a sponge as opposed to making strokes. This will help the paint to stay within the stencil lines. But remember, it doesn't have to be perfect!
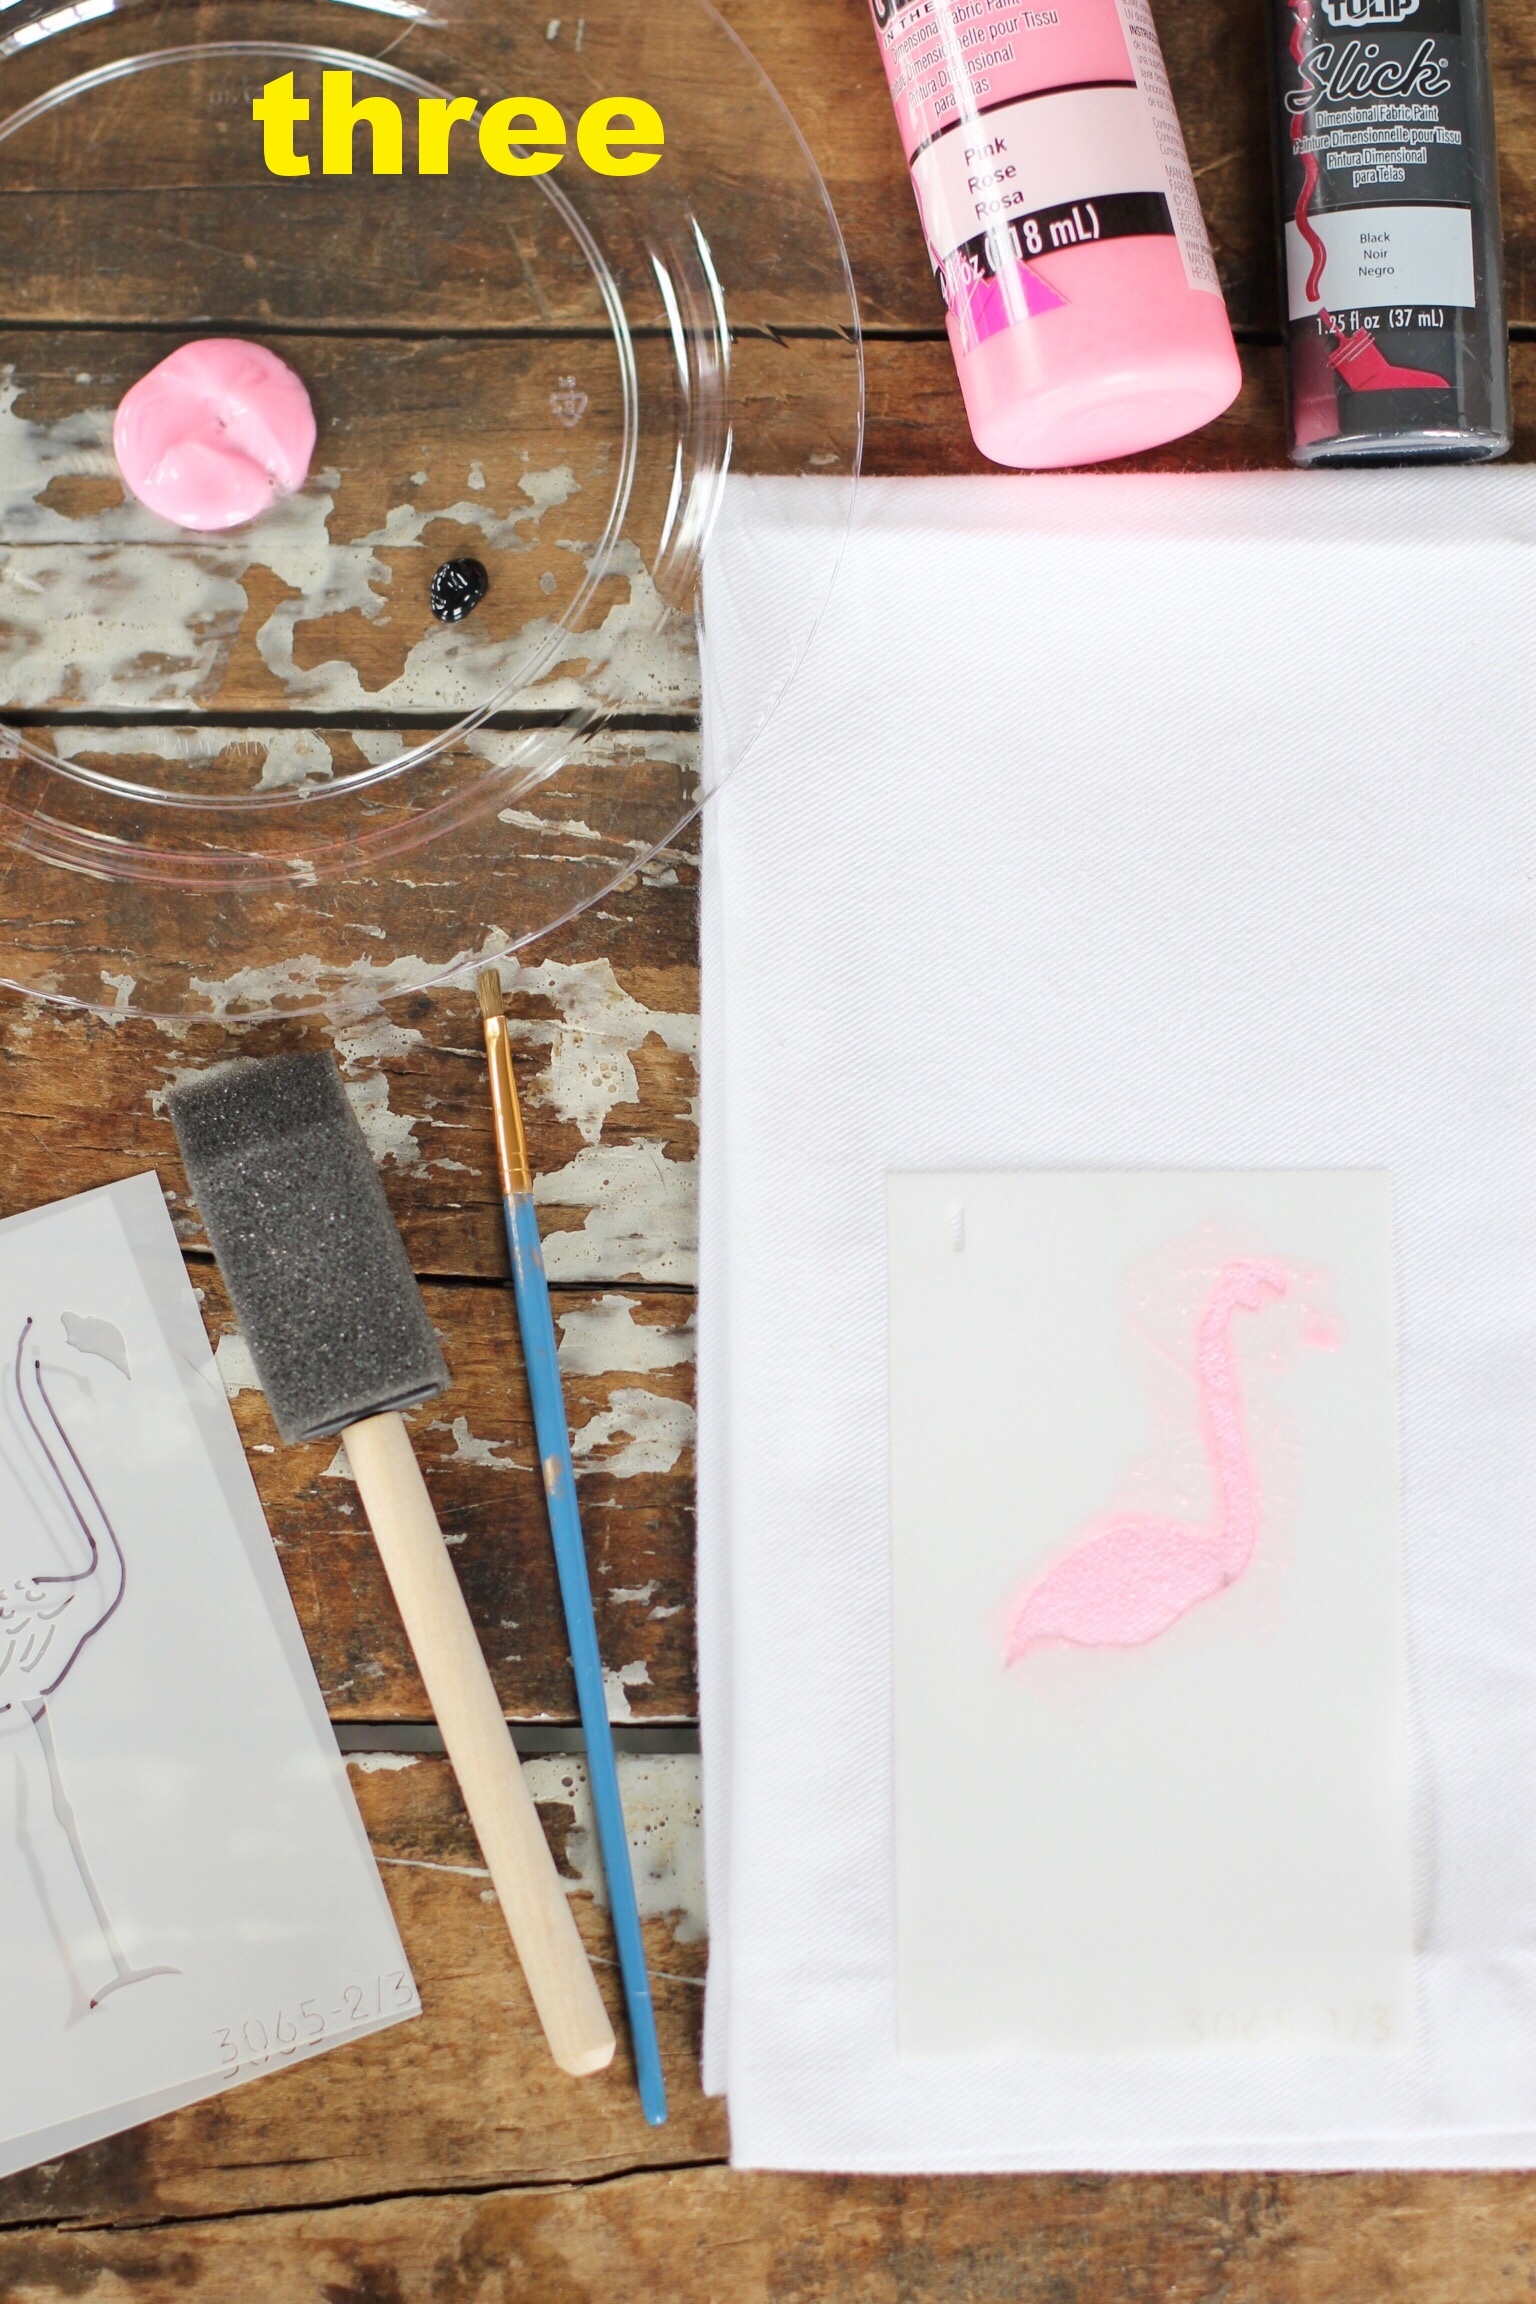
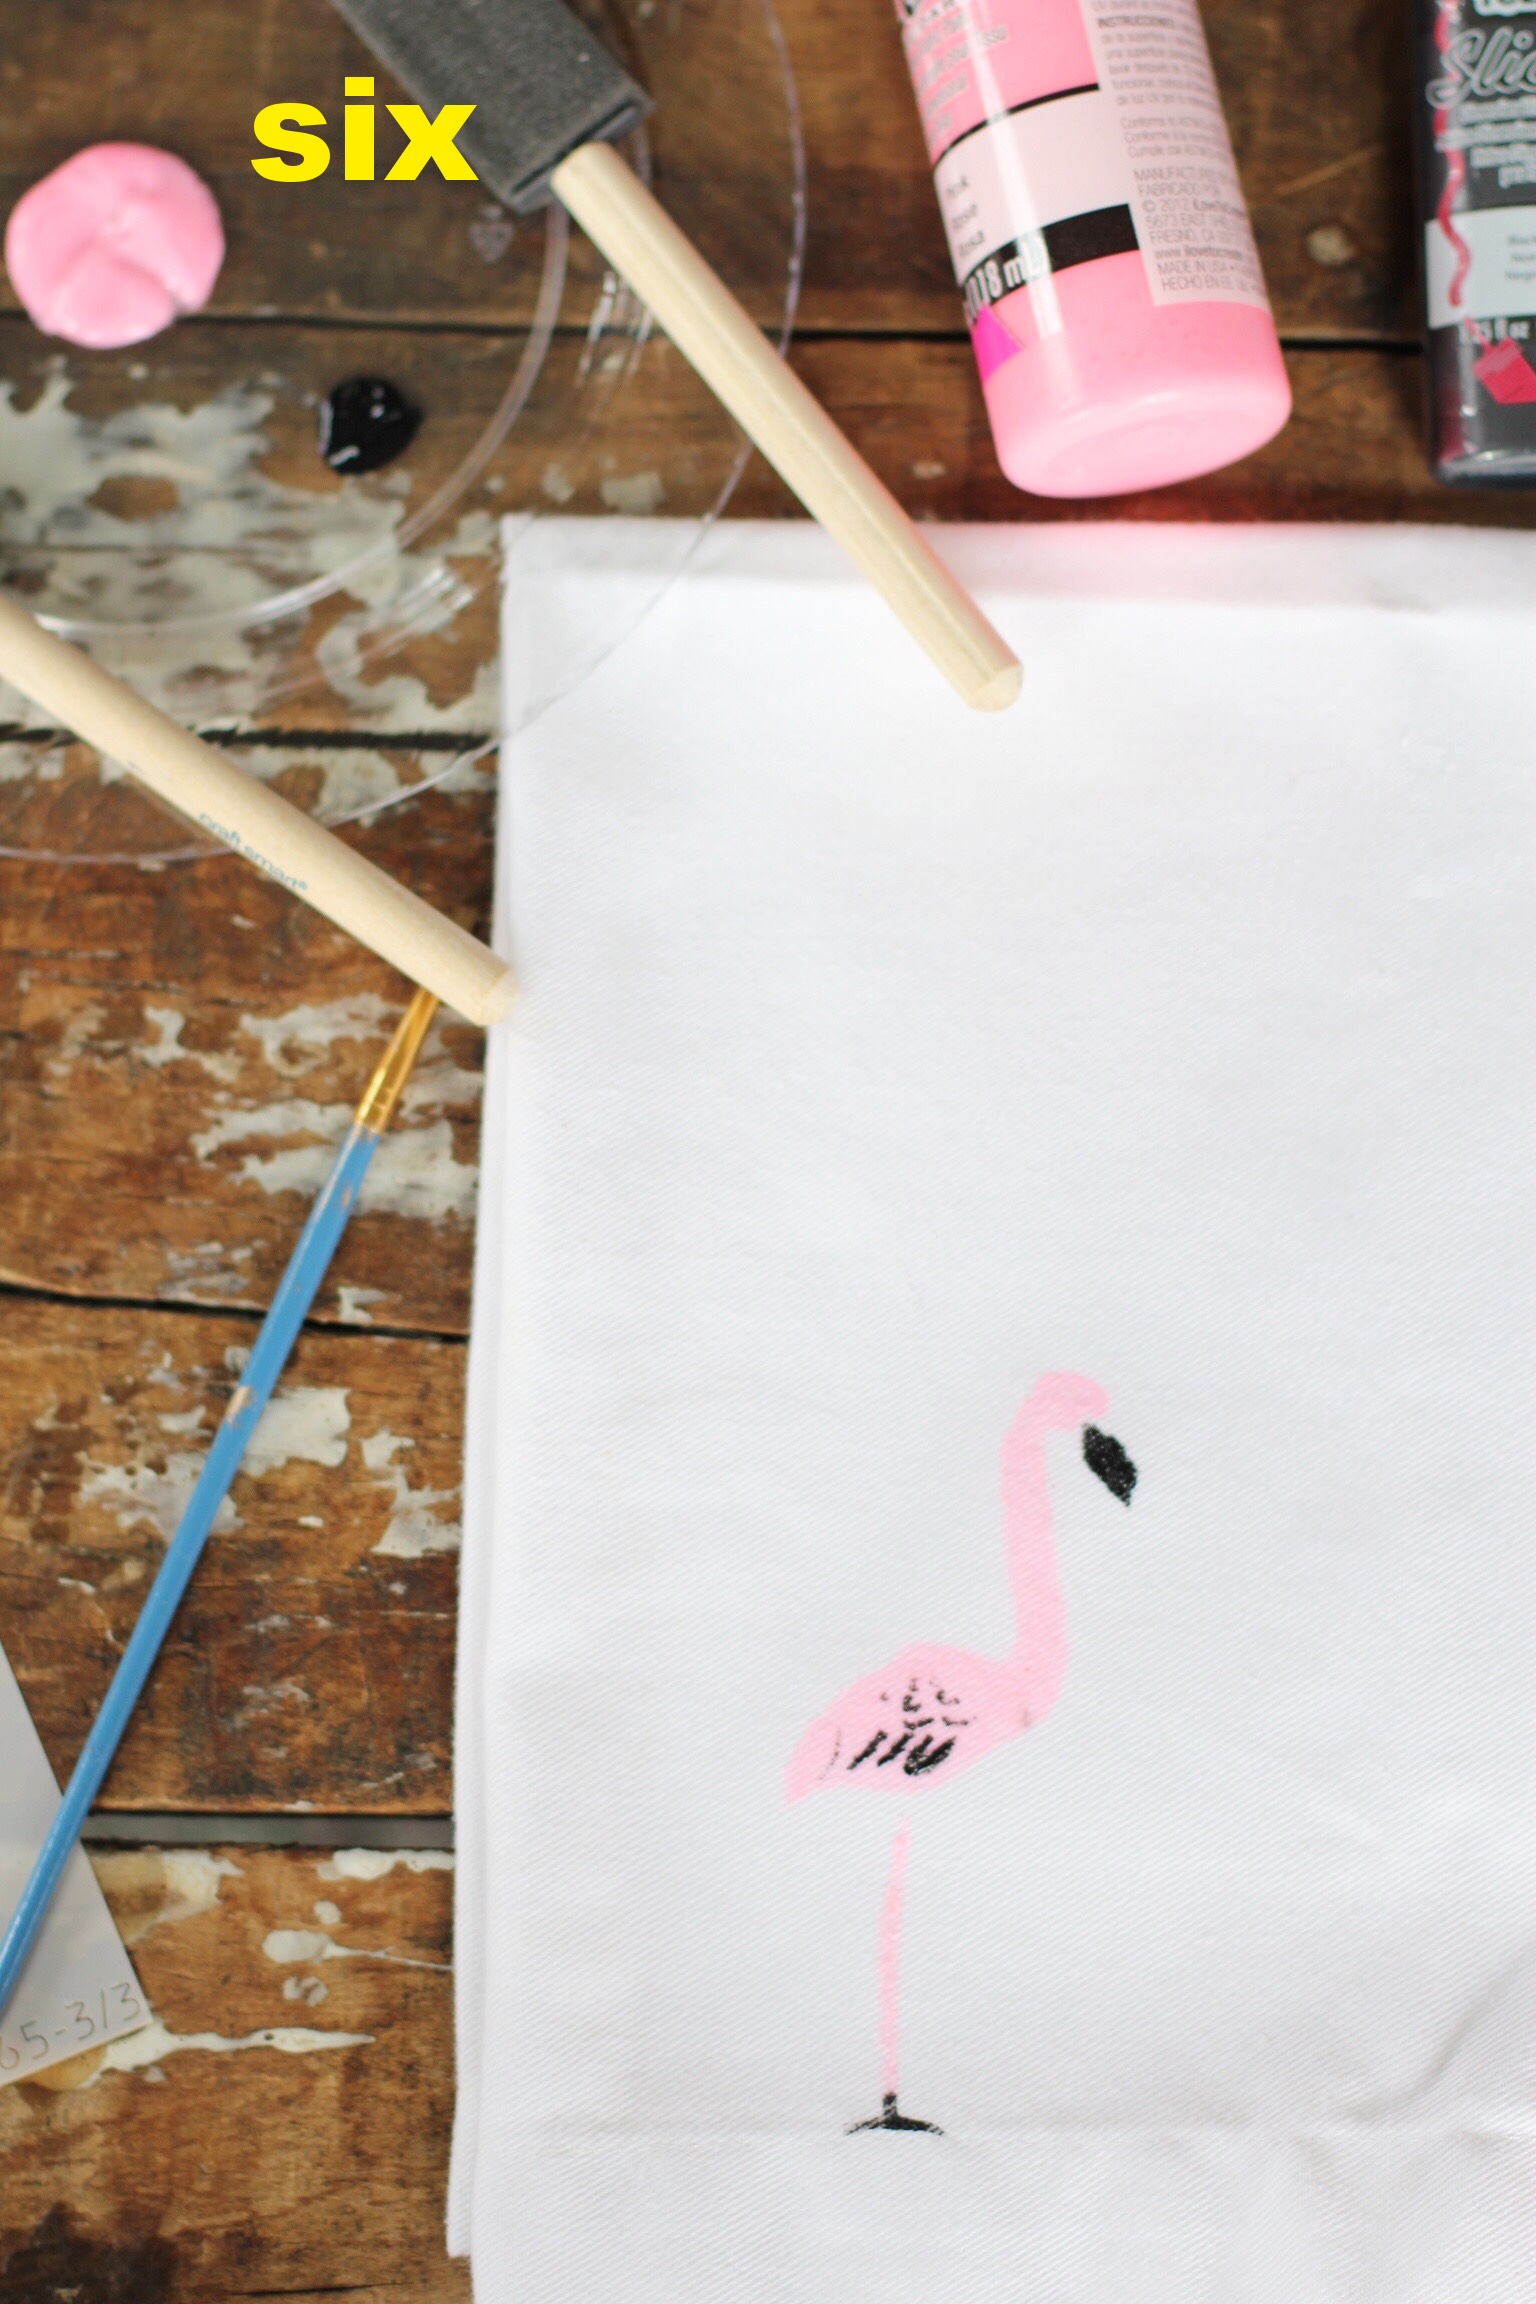
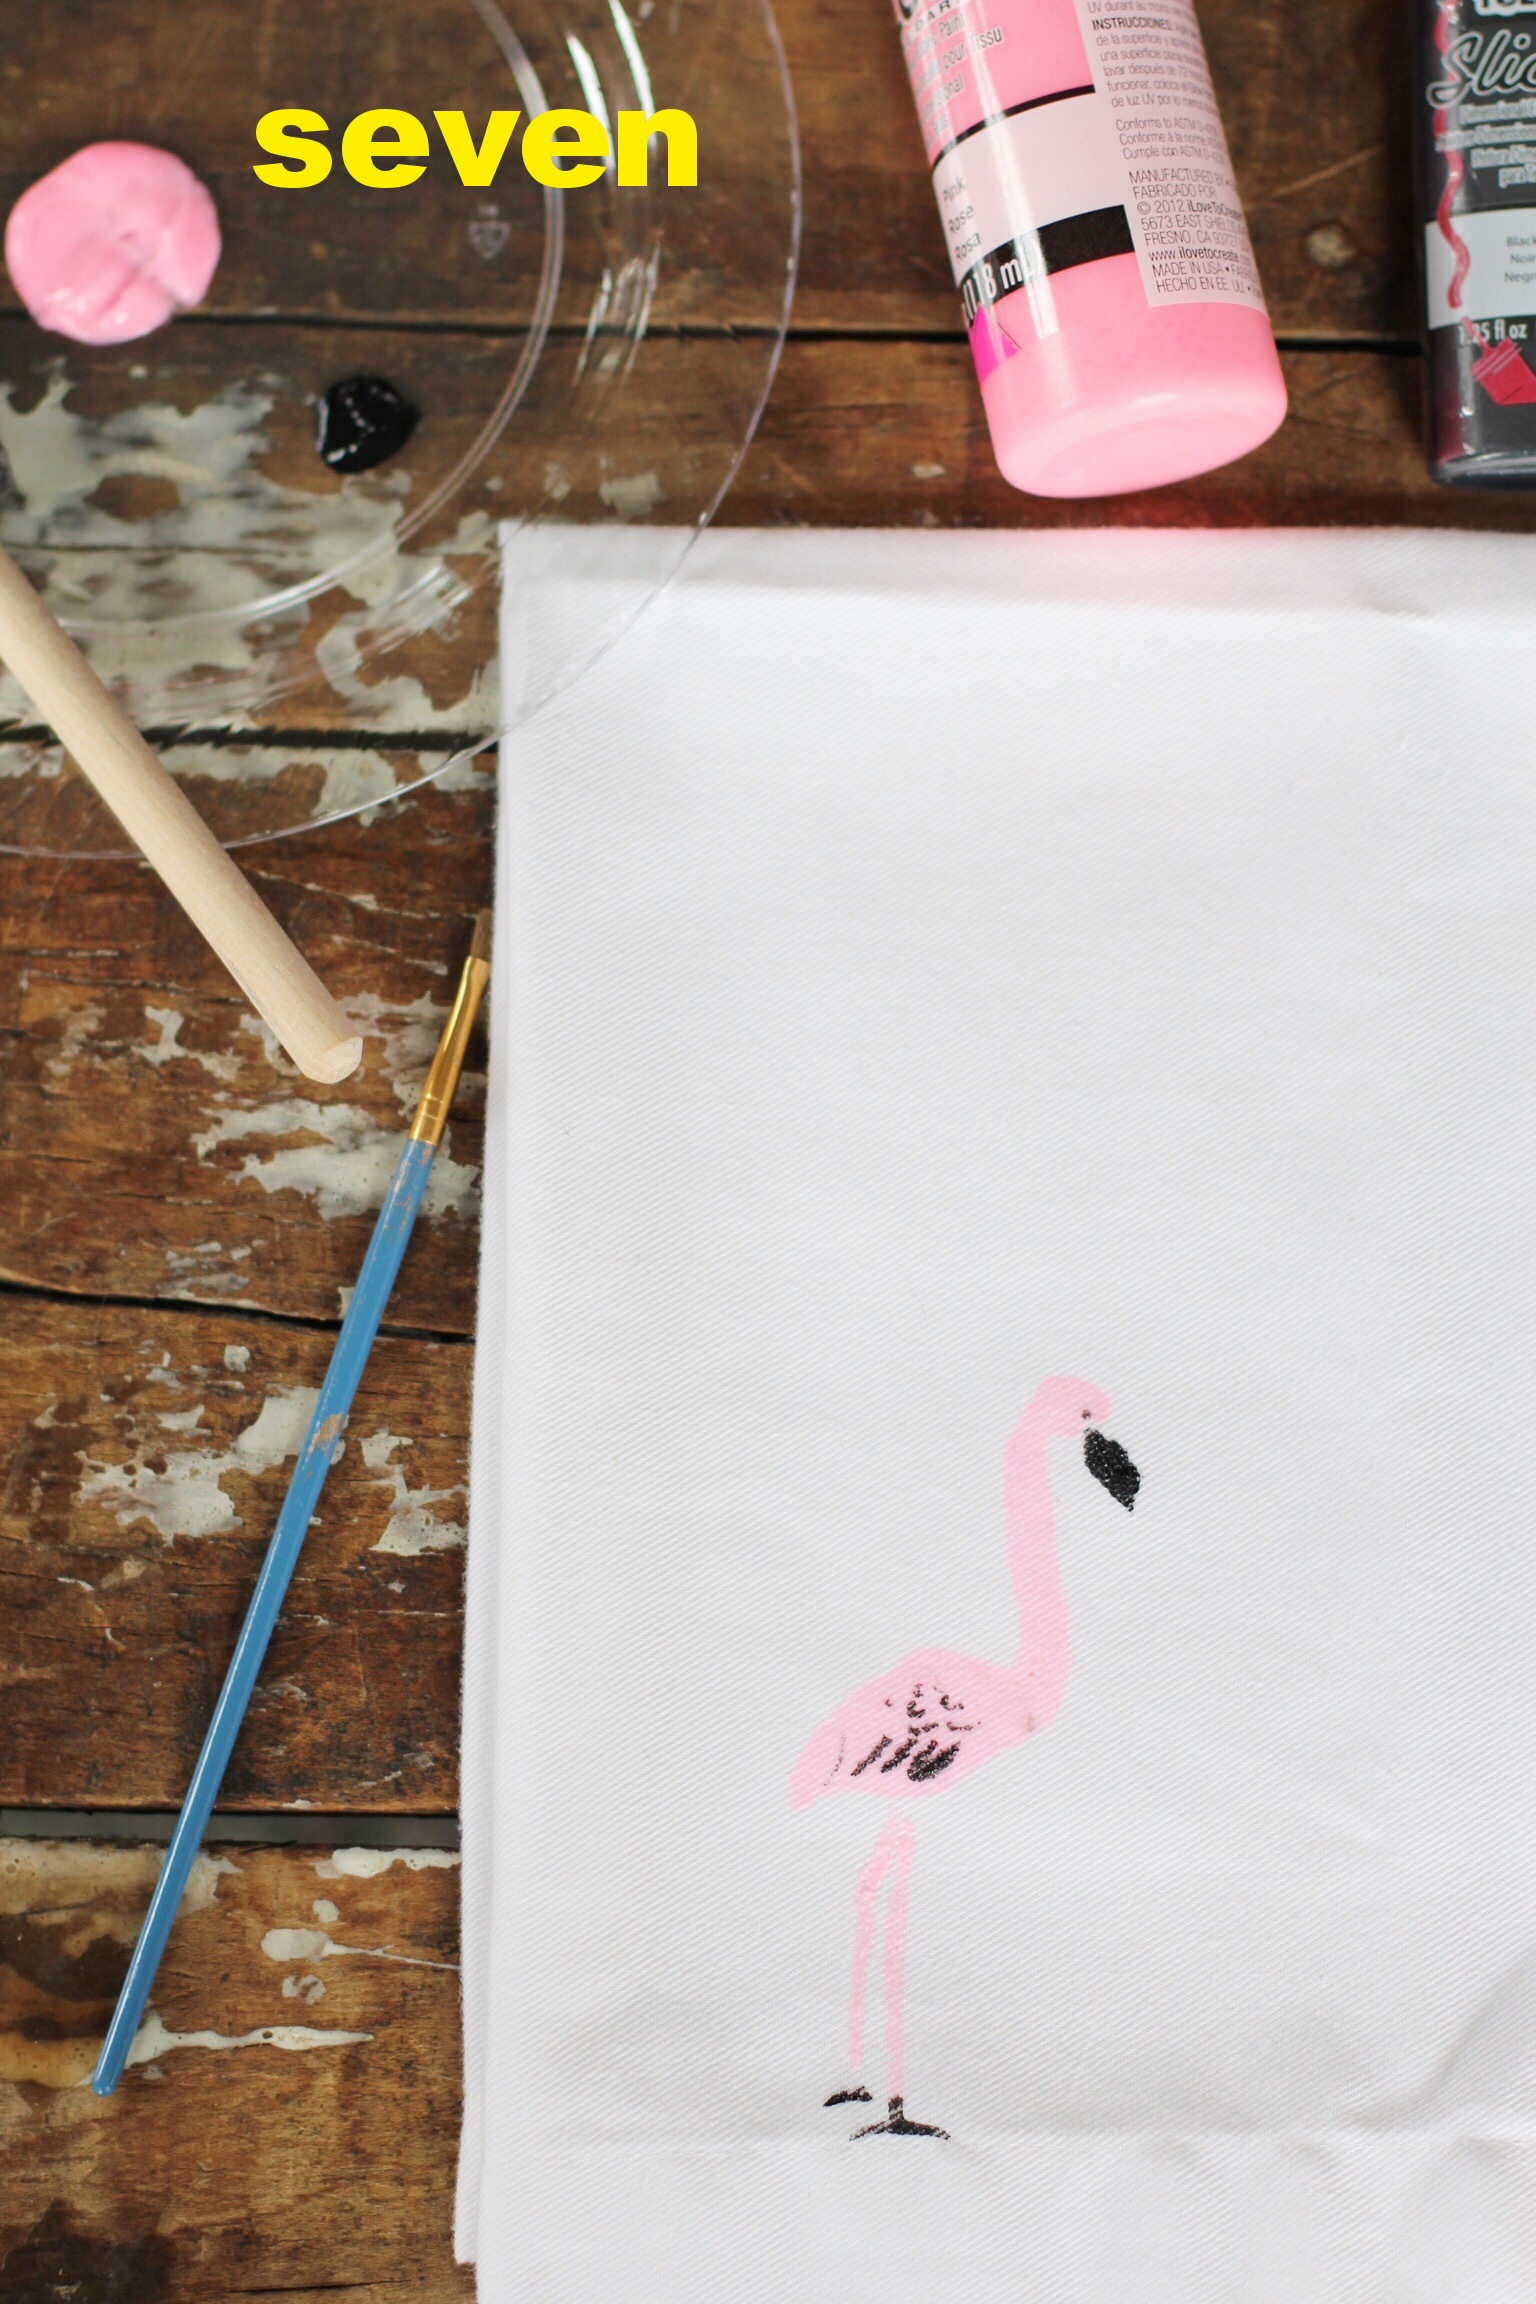
Now, when you're ready to begin, use your stencil according to directions, which, if you're using the same stencil as me, occurs in three steps. Begin with the first stencil and fill it in with pink (or multiple pinks if you're using more than one)—step 3 above, followed by the second stencil in both black and pink (black markings on wing, black beak, black foot, pink leg)—step 5 above, and lastly the third stencil in both black and pink (black eyeball, black foot, pink leg)—step 7 above.
After the third stencil, in the last picture above, I used my pink brush to very lightly blend the black markings on the wings to make them a little less severe, but you certainly don't have to do that.
Let dry completely while you repeat with other napkins, and wash and dry stencil off between each use to avoid smudging/residue.